通过阅读本课程你可以学到以下知识:
1.使用表单组件、表单验证、Alert警告框
2.实现列表页并重写单元格
3.保存与读取数据到本地
4.页面跳转
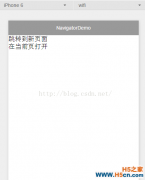
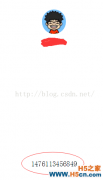
先看一上效果图
图0-1

图0-2

一、创建项目并勾上quickStart
如图1-1

二、首页
首页包含一个添加收支按钮与所有条目的列表
1. 首页布局
1.1 增加一个添加按钮
- <!--index.wxml-->
- <view class="container">
- <navigator url="../item/item" hover-class="navigator-hover">添加收支</navigator>
- </view>
1.2 设置按钮按下高亮样式hover-class
- /**index.wxss**/
- /** 修改默认的navigator点击态 **/
- .navigator-hover {
- color:#2297f1;
- }
2. 添加页面布局
依次新建一个item文件夹,item.wxml item.wxss item.js item.json
如图2-2-1

修改app.json
- {
- "pages":[
- "pages/index/index",
- "pages/item/item"
- ],
- "window":{
- "backgroundTextStyle":"light",
- "navigationBarBackgroundColor": "#2297f1",
- "navigationBarTitleText": "灵犀账本",
- "navigationBarTextStyle":"white"
- }
- }
item.wxml
- <!--item.wxml-->
- <view class="page">
- <view class="section">
- <view class="section__title">标题</view>
- <input bindinput="bindTitleInput" placeholder="内容" value="{{title}}" />
- </view>
- <view class="section">
- <view class="section__title">类型</view>
- <radio-group class="radio-group" bindchange="radioChange">
- <label class="radio">
- <radio class="radio" value="income" checked="true"/>收入
- </label>
- <label class="radio">
- <radio class="radio" value="cost"/>支出
- </label>
- </radio-group>
- </view>
- <view class="section">
- <view class="section__title">金额</view>
- <input bindinput="bindAccountInput" type="number" placeholder="请输入数字,不加正负号"/>
- </view>
- <button class="button" type="primary">添加</button>
- </view>
item.wxss
- .page {
- min-height: 100%;
- flex: 1;
- background-color: #FBF9FE;
- font-size: 32rpx;
- font-family: -apple-system-font,Helvetica Neue,Helvetica,sans-serif;
- overflow: hidden;
- }
- .page input{
- padding: 20rpx 30rpx;
- background-color: #fff;
- }
- .section{
- margin:40rpx 0;
- }
- .section_gap{
- padding: 0 30rpx;
- }
- .section__title{
- margin-bottom: 16rpx;
- padding-left: 30rpx;
- padding-right: 30rpx;
- }
- .section_gap .section__title{
- padding-left: 0;
- padding-right: 0;
- }
- .radio-group {
- margin:50rpx;
- font-size:25rpx;
- }
- .radio{
- margin-right: 20rpx;
- }
- /**按钮**/
- .button {
- margin:10rpx;
- }
item.js
- // item.js
- Page({
- data: {
- title: '',
- cate:'',
- account: ''
- },
- // 标题文本框
- bindTitleInput: function(e) {
- this.setData( {
- title: e.detail.value
- })
- console.log(e.detail.value)
- },
- // 金额radio
- radioChange: function(e) {
- this.setData({
- cate: e.detail.value
- })
- console.log(e.detail.value)
- },
- // 金额文本框
- bindAccountInput: function(e) {
- this.setData( {
- account: e.detail.value
- })
- console.log(e.detail.value)
- },
- })
item.json
- {
- "navigationBarTitleText": "添加收支"
- }
查看效果:
如图2-2-2
3.1
保存数据到本地存储
在item.js文件中创建save方法并与视图绑定
- // item.js
- Page({
- data: {
- title: '',
- cate:'',
- account: '',
- modalHidden: true
- },
- // 标题文本框
- bindTitleInput: function(e) {
- this.setData( {
- title: e.detail.value
- })
- // console.log(e.detail.value)
- },
- // 金额radio
- radioChange: function(e) {
- this.setData({
- cate: e.detail.value
- })
- // console.log(e.detail.value)
- },
- // 金额文本框
- bindAccountInput: function(e) {
- this.setData( {
- account: e.detail.value
- })
- // console.log(e.detail.value)
- },
- save: function() {
- var that = this
- // 本条数据打包成json
- var record = {
- title: this.data.title,
- cate: this.data.cate,
- account: this.data.account,
- }
- var data = []
- wx.getStorage({
- key: 'db',
- success: function(res) {
- console.log('db:' + res.data)
- data = res.data
- // 取出本地数据
- data.push(record)
- // 存回本地
- wx.setStorage({
- key: 'db',
- data: data
- })
- // 提示框
- that.setData({
- modalHidden: false
- });
- }
- })
- },
- // 使用onShow而不使用onLoad,使得添加返回后自刷新
- onShow: function() {
- wx.getStorage({
- key: 'db',
- // 初始加载无数据,故插入一条空数组的新key
- fail: function() {
- // 存回本地
- wx.setStorage({
- key: 'db',
- data: []
- })
- }
- })
- },
- // 关闭对话框
- hideAlertView: function() {
- this.setData({
- 'modalHidden': true
- })
- // 返回上一页
- wx.navigateBack()
- }
- })
值得注意的是:setStorage是包在getStorage方法回调事件里,保证线程一致性,即使使用了Sync方式的方法,依次不能保证数据同步,经多次实践发现getStorage方法是最后被调的,于是就无法取出原来的数据,也就不能追加本条数据了。
与视图绑定添加按钮的点击事件与弹窗的点击事件
- <button class="button" type="primary" bindtap="save">添加</button>
- <modal class="modal" hidden="{{modalHidden}}" no-cancel bindconfirm="hideAlertView">
- <view>添加成功</view>
- </modal>
四、首页读取列表
1.首页布局
- <!--index.wxml-->
- <view class="container news-list">
- <view class="navi">
- <button class="add-button" size="mini" type="primary" bindtap="addItem">添加收支</button>
- </view>
- <block wx:for="{{items}}">
- <view class="news-item" data-title="{{item.title}}">
- <view class="news-text">
- <text class="news-title">{{item.title}}</text>
- <view class="news-stamp">
- <text>{{item.cate}} {{item.account}}</text>
- <text>2016-9-29{{item.date}}</text>
- </view>
- </view>
- </view>
- </block>
- </view>
2.首页样式
- /**index.wxss**/
- /*添加按钮*/
- .navi {
- width:100%;
- }
- .add-button {
- float: right;
- }
- /*列表*/
- .news-list {
- display: flex;
- flex-direction: column;
- padding: 40rpx;
- }
- .news-item {
- display: flex;
- flex-direction: row;
- text-align: left;
- width: 100%;
- }
- .news-text {
- display: flex;
- flex-direction: column;
- width:100%;
- border-bottom: 1px solid #ccc;
- line-height: 30px;
- }
- .news-stamp {
- font-size: 30rpx;
- color:darkgray;
- margin: 20rpx;
- display: flex;
- flex-direction: row;
- justify-content:space-between;
- }
- .news-title {
- margin: 20rpx;
- margin-bottom: 0rpx;
- font-size: 40rpx;
- }
3.首页js
- //index.js
- //获取应用实例
- Page({
- data: {
- items: []
- },
- addItem: function() {
- wx.navigateTo({
- url: '../item/item'
- })
- },
- onLoad: function () {
- var that = this
- wx.getStorage({
- key: 'db',
- success: function(res) {
- console.log(res.data.length);
- that.setData({
- 'items':res.data
- });
- }
- })
- }
- })
检查效果,如图4-1
结语
整体开发过来,还是比较自然的。有几个要点值得注意:
- getStorage的异步性;this的作用域,声明var that = this,才可以在success回调函数中访问。
- AlertView模态窗口的写法,要通过绑定数据到<modal>的hidden属性,这跟以往弹窗的写法都不相同,体现小程序数据自动刷新的思想。
3.在wxss中使用流程控制跟平时的思路也不一样,是定位于整个view而言的,于是为出支红绿着色只能写成这样形式:
- <text wx:if="{{item.cate == '-'}}" class="sign-green">{{item.cate}} {{item.account}}</text>
- <text wx:else class="sign-red">{{item.cate}} {{item.account}}</text>
这种形式比较冗余,能直接写在class中就好了。
本打算再做一个日期选择,演示Picker的写法,但发现官网文档上的没有实现,而普通自定义数据的Picker却可行,找到方法再来更新本教程与git源。
1.本站遵循行业规范,任何转载的稿件都会明确标注作者和来源;2.本站的原创文章,请转载时务必注明文章作者和来源,不尊重原创的行为我们将追究责任;3.作者投稿可能会经我们编辑修改或补充。
 相关文章
相关文章-
微信小程序 轮播图 swiper图片组件
2016-11-23 09:49
-
微信小程序 开发 微信开发者工具 快捷键
2016-11-23 09:49
-
微信小程序 页面跳转 传递参数
2016-11-23 09:49
-
微信小程序 如何获取时间
2016-11-23 09:49
网友点评 精彩导读
精彩导读

 热门资讯
热门资讯 关注我们
关注我们

